
Table of Contents
- Site Assessment and Measurement
- Clearing the Area of Obstructions
- How to Calculate Driveway Excavation Depth
- Excavation and Soil Removal
- Soil Condition Analysis and Leveling
- Driveway Base Material Requirements and Sub-Base Installation
- Driveway Drainage Solutions and Edge Restraints
- Preparing Land for Driveway Installation: Final Inspection and Settlement
Last Updated: August 15, 2026
Site Assessment and Measurement
Aproper site assessment determines excavation depth, drainage requirements, material specifications, and potential obstacles. Skip this step and you’ll face settling driveways, water pooling, or worse.
Start by measuring your driveway area with stakes and string. Most residential driveways run 10 to 20 feet wide and 20 to 40 feet long. Photograph the existing terrain from multiple angles, overhead, side views, and corners, to establish your baseline.
Assess slope and drainage by walking the property after heavy rain. Observe where water flows and whether it pools near structures. This tells you what the soil naturally does with water, directly impacting your sub-base design.
Contact your local utility locating service (typically “Call 811”) to have underground utilities marked before proceeding. Gas lines, electrical conduits, water mains, and sewer lines are serious hazards.
Examine existing soil by pushing a shovel into the ground at several points. Clay holds water and compacts hard. Sandy soil drains quickly but offers less load-bearing capacity. Rocky soil requires more excavation effort but often provides natural drainage. Soil type determines your base material requirements.
Check local building codes and permitting requirements. Some municipalities require permits for driveway work, especially near wetlands or floodplains. A call to your local planning office prevents costly rework.
Clearing the Area of Obstructions
Aclear work area is non-negotiable. Vegetation, rocks, stumps, and debris prevent equipment access and slow progress.
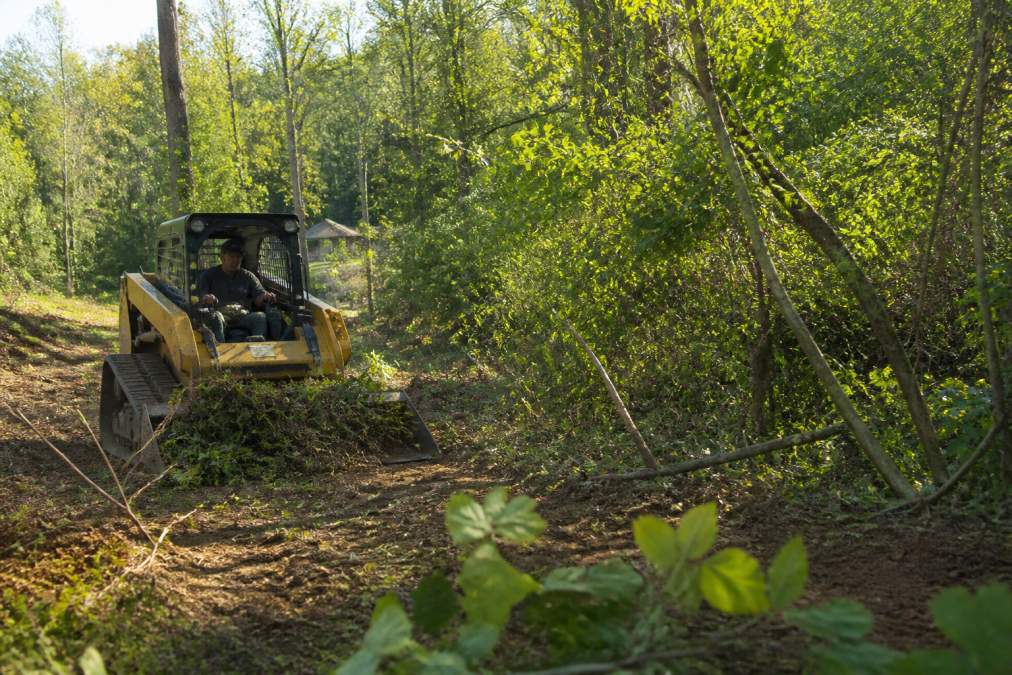
Start with vegetation removal. Cut back trees, shrubs, and brush within your driveway footprint. For significant brush or trees, professional equipment like a forestry mulcher clears material efficiently. Timber Shredders LLC uses professional equipment to clear overgrown properties, grinding vegetation into mulch that improves soil health.
Remove large rocks and boulders from the surface, these become obstacles for grading equipment and create uneven settling points. Address any stumps in your driveway path; leaving them creates settling problems and prevents proper compaction as they decay over time.
Clear fallen logs, branches, and debris. Even small branches interfere with grading and compaction equipment. Bare ground with no obstructions and clear equipment access is your goal.
How to Calculate Driveway Excavation Depth
Excavation depth determines load-bearing capacity and drainage performance. For most residential driveways in moderate climates, excavate 4 to 6 inches below your finished surface. This allows room for a proper sub-base layer and accommodates seasonal frost heave.
In colder regions where frost penetrates deeper, you may need 8 to 10 inches of excavation to reach below the frost line. Clay soils require deeper excavation because they retain water and experience significant frost heave. Sandy soils drain better and can work with shallower excavation.
Vehicle weight matters too. Standard cars and light trucks (under 8,000 pounds) work with 4 to 6 inches. Heavy trucks or equipment storage requires 6 to 8 inches minimum.
Add 2 inches for gravel base, 2 to 3 inches for compacted sub-base material, and your finished surface thickness (typically 2 to 4 inches for asphalt, 3 to 6 inches for concrete). For a standard residential driveway in moderate climate with clay soil, excavate 6 inches total. You’ll add 4 inches of sub-base aggregate (compacted), 2 inches of gravel base, then your surface material.
Excavation and Soil Removal
Use appropriate equipment for your site size. Small driveways (under 500 square feet) work with a walk-behind skid steer or rented mini excavator. Larger driveways benefit from full-size excavators or loader equipment.
Excavate to consistent depth across the entire driveway area. Inconsistent depth creates settling problems, shallow areas settle differently than deep areas, causing surface cracks and ruts. Use a laser level or string line to maintain consistent grade.
Remove excavated soil completely from the driveway area. You’ll replace it with engineered sub-base material, not native soil. Native soil often contains clay, organic material, and poor compaction characteristics. If excavated soil is good topsoil without clay or rocks, stockpile it for landscaping elsewhere. If it’s clay-heavy or poor quality, haul it away.
Watch for unexpected conditions during excavation: bedrock, utility lines you missed during marking, or buried debris. Bedrock requires additional removal effort. Utilities require immediate work stoppage and professional notification.
Soil Condition Analysis and Leveling
Once excavated to depth, examine the exposed soil at the bottom of your excavation. This is your actual foundation.
Perform a simple percolation test to understand drainage. Dig a small hole at the bottom of your excavation, fill it with water, and observe drainage speed. Water disappearing in minutes indicates good drainage. Water sitting for hours indicates poor drainage and clay-heavy soil, requiring additional drainage solutions.
Level the excavation bottom using a grading blade or hand tools to create a consistent, flat surface. Aim for a surface that’s level across the entire driveway width with a slight slope (1/8 inch per foot) toward your drainage direction.
Compact the exposed soil if it’s loose or disturbed. A plate compactor or roller densifies the native soil, preventing future settling. If you encounter very soft soil (waterlogged clay, organic material, or peat), remove it completely and replace it with engineered fill.
Driveway Base Material Requirements and Sub-Base Installation
Your sub-base is the engineered layer that replaces native soil and provides load-bearing capacity. This is where most driveway problems originate.
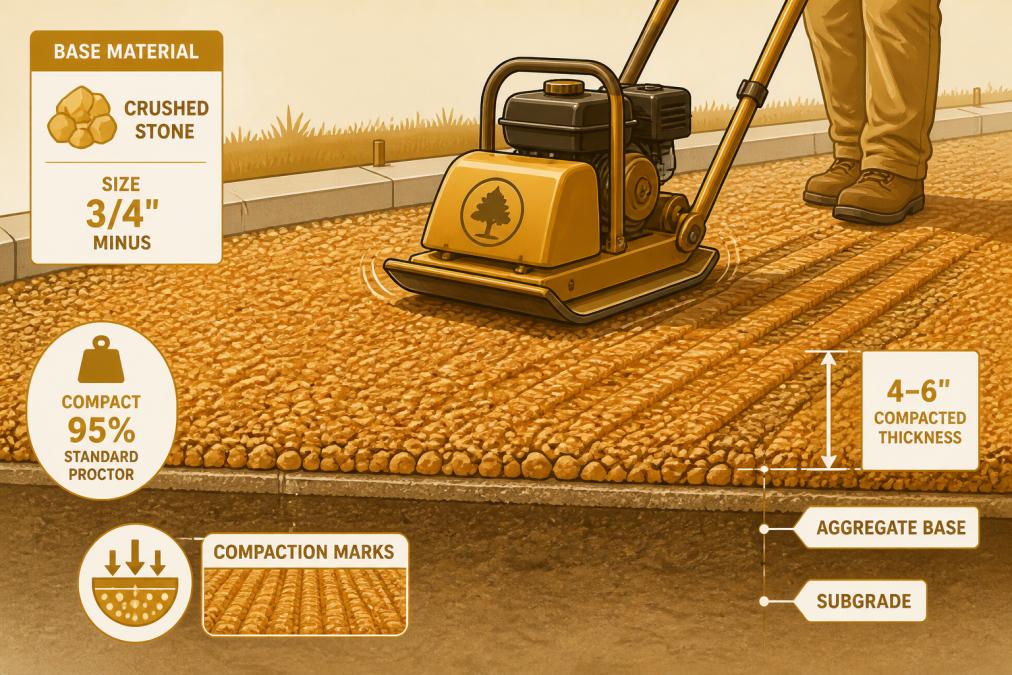
Use crushed stone aggregate, typically 3/4-inch minus (stones up to 3/4 inch with finer particles filling voids). This size range compacts well, locks together, and provides excellent load distribution. Avoid river rock or smooth gravel, which don’t compact and shift under load.
Install 4 to 6 inches of compacted sub-base aggregate for standard residential driveways. This thickness provides adequate load-bearing capacity and allows proper compaction. Compaction is non-negotiable, use a plate compactor or vibratory roller with multiple passes (typically 4 to 6) until material no longer shifts under equipment weight.
Proper compaction increases load-bearing capacity dramatically. Loose aggregate might support 5,000 pounds per square foot. Properly compacted aggregate supports 15,000 to 20,000 pounds per square foot.
Add a geotextile fabric layer between native soil and sub-base aggregate if your site has poor drainage or clay soil. This prevents fine soil particles from migrating into your aggregate layer. Slope your sub-base layer slightly toward your drainage direction (1/8-inch-per-foot) to ensure water doesn’t pool on top.
Driveway Drainage Solutions and Edge Restraints
Water is your driveway’s primary enemy. Proper drainage prevents pooling, protects your sub-base from saturation, and extends driveway life significantly.
Create surface drainage by sloping your finished driveway away from structures at 1/8-inch drop per foot of width. Install subsurface drainage if your site has poor natural drainage or clay soil, a perforated drain pipe along the driveway edge collects water and diverts it away from your sub-base.
Swales (shallow, sloped channels) direct surface runoff away from your driveway. If your property slopes toward your driveway, create a swale uphill to intercept water before it reaches your surface.
Edge restraints prevent your driveway edges from spreading under vehicle weight. Install concrete or plastic edge restraints along both sides at your finished surface height to anchor your driveway material in place.
Preparing Land for Driveway Installation: Final Inspection and Settlement
Before you pour concrete or lay asphalt, inspect your entire prepared site.
Walk the entire driveway area and verify consistent depth using a measuring tape or laser level. Verify sub-base compaction by walking across the aggregate, it should feel firm and stable. Check drainage by spraying water across your finished sub-base; water should run toward your intended drainage direction, not pool.
Inspect edge restraints for proper anchoring, correct height, and straight alignment. Confirm utility marks are still visible; utility locating marks fade over time.
Allow your prepared site to settle for several days if possible. Fresh compaction can settle slightly as vibration and traffic compress the material further. A short settlement period (3 to 7 days) followed by a final leveling pass ensures your surface material sits on stable ground.
Document your preparation with photos to prove you’ve followed proper procedure and for troubleshooting if issues arise later.
The preparation work you’ve completed is invisible once your driveway surface is installed, but it determines whether your driveway lasts 10 years or 25 years. Proper site assessment, excavation, sub-base installation, and drainage solutions create a foundation that supports vehicles reliably while managing water effectively.
Timber Shredders LLC helps properties throughout the region prepare sites properly for driveway installation. From initial site assessment through final compaction verification, professional preparation ensures your driveway investment performs as expected. A thorough approach to land preparation transforms an unstable, drainage-prone site into a stable, long-lasting driveway foundation.
Preparing land for new driveway installation requires attention to detail at every stage, from initial site assessment through final compaction verification. Timber Shredders LLC brings professional expertise and specialized equipment to handle site clearing, excavation, sub-base installation, and drainage solutions that ensure your driveway foundation remains stable and properly drained for years to come. Get a free quote today and discover how professional land preparation protects your driveway investment.
Frequently Asked Questions
What is the proper base depth for a residential driveway?
Most residential driveways require 4 to 6 inches of compacted base material, depending on soil conditions and climate. In areas with freeze-thaw cycles, deeper bases (6 inches or more) prevent frost heave damage. The actual depth depends on your specific soil type, drainage capacity, and whether you’re installing asphalt or concrete. A site assessment determines your exact requirements.
Can you lay asphalt directly on dirt?
No. Laying asphalt directly on dirt causes premature failure due to poor load-bearing capacity and drainage problems. Proper driveway preparation requires excavation, soil removal, compaction, and installation of a crushed stone or aggregate sub-base layer. This foundation prevents settling, rutting, and water damage that would otherwise destroy the asphalt surface within a few years.
How do I ensure proper drainage for a new driveway?
Proper driveway drainage solutions include sloping the surface 1 to 2 percent away from structures, installing a permeable base layer, and directing runoff toward drainage areas or swales. For problem areas, geotextile fabric beneath the sub-base prevents soil migration while allowing water flow. Edge restraints contain the base material and prevent lateral movement that can trap water and cause damage.
Do I need a permit to install a new driveway on my property?
Permit requirements vary by locality. Many jurisdictions require permits for new driveway installation or significant modifications. Contact your local building or planning department to confirm requirements before starting work. Some areas require site surveys or environmental assessments, especially for larger projects or properties with drainage concerns.
This article was written using GrandRanker