Table of Contents
- Assessing Your Gravel Driveway Damage
- What You’ll Need: Tools and Materials for Driveway Repair
- Step-by-Step Process: How to Repair Gravel Driveway Damage
- Gravel Driveway Drainage Solutions and Erosion Control
- Gravel Driveway Maintenance to Prevent Future Damage
- Gravel Driveway Repair Cost: DIY vs. Professional Services
- Common Mistakes to Avoid When Repairing Gravel Driveways
- Conclusion
Last Updated: July 30, 2026
Gravel driveways offer an affordable solution for rural properties but require ongoing maintenance. At Timber Shredders LLC, we understand that repairing gravel driveway damage is one of the most common questions property owners face, especially across Central Virginia where weather and heavy vehicle use take their toll on unpaved surfaces. Most damage can be addressed with the right approach, proper materials, and a clear understanding of what you’re dealing with.
Understanding what went wrong is the first step toward fixing it. A gravel driveway developing ruts, potholes, or washout areas isn’t failing because gravel is unstable, it’s failing because the underlying structure has shifted, water isn’t draining properly, or the top layer has been displaced by traffic. Below, we’ll walk you through how to assess your damage, gather the right tools and materials, and execute repairs that last.
Assessing Your Gravel Driveway Damage
Before you grab a shovel, understand what you’re looking at. Gravel driveway damage comes in several distinct forms, each requiring a different response.
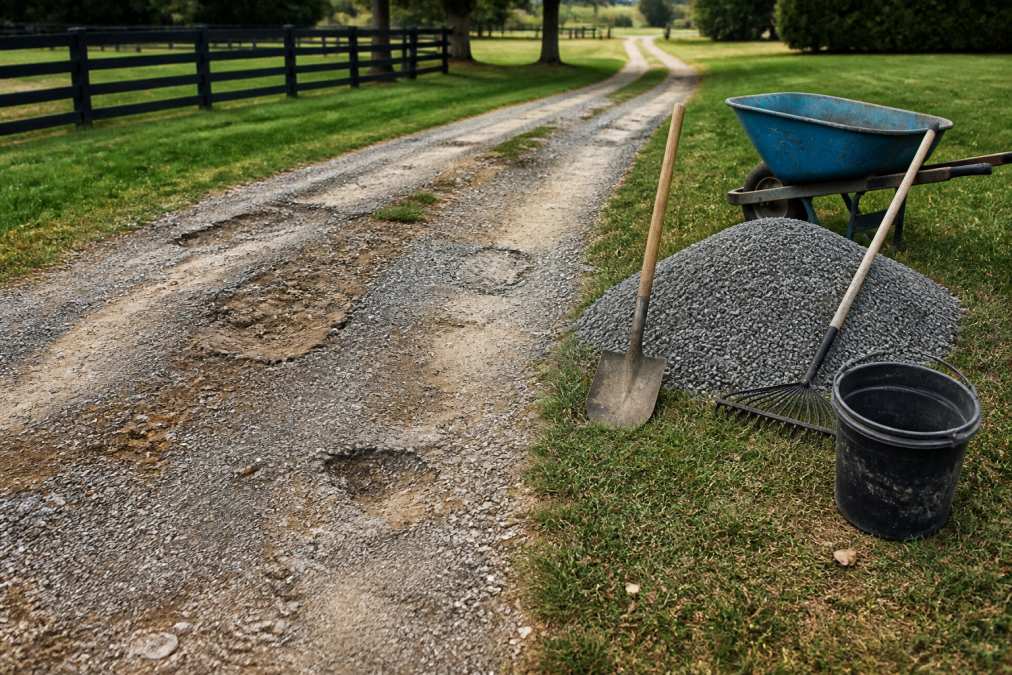
Potholes are deep, often water-filled depressions signaling a structural problem beneath the surface. A pothole 3-4 inches deep or deeper indicates the sub-base has settled or eroded. Ruts are elongated depressions running parallel to tire tracks, usually 1-2 inches deep, forming when heavy vehicles repeatedly compress gravel without adequate compaction underneath. Washout occurs when water flow carves channels through your driveway, removing both gravel and underlying material, a drainage problem first. Erosion is gradual material loss, typically at edges or slopes, where water runoff carries gravel away.
The real issue with most gravel driveway damage isn’t the surface layer you see but what’s happening underneath. If your sub-base is inadequate, water isn’t managed, or stone dust and aggregate haven’t been properly compacted, surface repairs will fail quickly. This is where many DIY attempts go wrong.
Identifying drainage problems requires observing your driveway during and after rain. Does water pool in certain areas? Does it run off uncontrolled? Are there visible channels where water has carved paths? These observations tell you whether your driveway crown (the slight slope that sheds water) is adequate and whether you need additional drainage solutions. Clay-heavy soils compact well but shed water poorly, while sandy soils drain quickly but don’t compact effectively.
What You’ll Need: Tools and Materials for Driveway Repair
Repairing a gravel driveway requires hand tools and, depending on damage scale, heavier equipment. Start with a shovel, rake, wheelbarrow, and level. A long straightedge or 2×4 board helps assess proper grading. For compaction, a plate compactor, either walk-behind or ride-on, is far more effective than hand tampers. Many equipment rental shops in Central Virginia rent plate compactors for $40-80 per day.
For material selection, choose between several aggregate types. Crushed stone or road base is the industry standard for sub-base layers, angular, compacts well, and provides structural support. Stone dust (crusher dust or quarry process) is fine material that fills gaps and helps bind the surface. Top dressing is typically pea gravel, chosen for appearance. The standard approach uses 4-6 inches of road base, 2-3 inches of stone dust mixed with smaller aggregate, and 1-2 inches of top dressing.
For erosion control and drainage, geotextile fabric is invaluable. This permeable landscape fabric prevents fine materials from migrating into the sub-base while allowing water to drain through. A proper crown has about 1/8 inch of rise per foot of width, making a significant difference in water management.
| Material/Tool | Purpose | When to Use |
|---|---|---|
| Road base (crushed stone) | Structural sub-base layer | Every repair; 4-6 inches deep |
| Stone dust | Binding layer and filler | Between base and top dressing |
| Pea gravel | Top dressing surface | Final 1-2 inches for appearance |
| Geotextile fabric | Erosion control and drainage | Slopes, washout areas, permeable base |
| Plate compactor | Material compaction | Areas larger than 100 sq ft |
| Hand tamper | Spot compaction | Small potholes, edge work |
| Shovel and rake | Material movement and grading | All repairs |
| Level and straightedge | Grading verification | Checking crown and drainage slope |
Step-by-Step Process: How to Repair Gravel Driveway Damage
The repair process follows a logical sequence: remove damaged material, prepare the base, add new material, compact it properly, and finish with top dressing. Skipping steps or rushing through compaction is where most DIY repairs fail.
Step 1: Clear Debris and Vegetation from Damaged Areas
Remove vegetation, debris, or loose material from the damaged section. Use a shovel to cut back grass or weeds encroaching on edges. Remove large rocks, sticks, and organic matter that could interfere with compaction. For extensive damage, remove the entire top layer of gravel down to the sub-base. For a pothole or rut, dig out the damaged area to at least 6 inches below visible damage, reaching stable, undisturbed material.
Step 2: Grade and Level the Sub-Base
Once cleared, assess the sub-base. If it’s compacted and stable, you’re ready to add new material. If it’s soft, muddy, or inadequate, add additional road base. Create a slight crown in the sub-base using a rake or shovel, matching your driveway’s overall slope. Use your level and straightedge to verify the slope, just enough to prevent water pooling.
Step 3: Fill Potholes and Ruts with Aggregate
Add road base material to the prepared area, slightly overfilling to account for compaction (road base compresses 15-20%). Spread evenly with a rake, creating a uniform layer matching the crown slope. For a pothole, add 4-6 inches of road base; for a rut, 2-3 inches if the sub-base is solid. Add a layer of stone dust mixed with smaller aggregate (about 2-3 inches), spreading evenly to match the crown.
Step 4: Compact Materials Using Proper Techniques
Compaction separates successful repairs from failed ones. A hand tamper works for small areas (under 20 square feet), but a plate compactor produces far better results. Make multiple passes, overlapping by about 6 inches, working from edges toward center. The material should feel solid and resistant to pressure. Plan for at least 3-4 passes with a plate compactor on new material.
Step 5: Add Top Dressing and Create Proper Crown
Add 1-2 inches of pea gravel or similar top dressing, spreading evenly and raking to match the crown. Aim for about 1/8 inch of rise per foot of width. Use your straightedge to verify water doesn’t pool anywhere. Apply light compaction to the top layer with a hand tamper or single plate compactor pass on low vibration.
Gravel Driveway Drainage Solutions and Erosion Control
Water is the enemy of gravel driveways. It erodes material, creates washout channels, causes ruts, and destabilizes the sub-base. Managing water runoff is as important as the repair itself.
Start with the crown. A properly crowned driveway sheds water naturally, preventing pooling and reducing erosion. If your driveway is flat or crowned incorrectly, water will collect and cause damage. Regrading the entire surface to create consistent slope is labor-intensive but worthwhile for widespread damage.
For washout-prone areas, especially on slopes, install geotextile fabric beneath your gravel. This permeable fabric prevents fine materials from washing away while allowing water to drain through. Lay it over your sub-base before adding binding and top layers.
Permeable base layers using recycled asphalt or open-graded aggregate allow water to drain through rather than pooling. This works well for complete section rebuilds, though it’s more expensive than standard road base.
The most effective long-term solution combines proper crown, geotextile fabric in high-risk areas, and regular maintenance. Raking your driveway 2-3 times per year redistributes material, fills small ruts, and maintains the crown.
Gravel Driveway Maintenance to Prevent Future Damage
A repaired gravel driveway requires ongoing attention. Maintenance is simple and inexpensive compared to major repairs.
Regular raking is the single most important maintenance task. Rake 2-3 times per year, more frequently with heavy use. Raking redistributes displaced material, fills small ruts before they deepen, and maintains the crown. It takes 1-2 hours for a typical residential driveway.
Compaction maintenance involves periodically running a plate compactor over the surface, especially after adding new material or heavy rain. Many property owners rent a compactor once or twice yearly for a full-surface pass.
Weed control prevents vegetation from breaking up the surface. Hand-pull weeds from edges and cracks. For aggressive growth, apply broad-spectrum herbicide to driveway edges, avoiding direct gravel application.
Heavy vehicle preparation means being mindful of weight distribution. If expecting delivery trucks or construction equipment, add extra base material in advance or rent a compactor to reinforce the surface.
Seasonal maintenance varies by region. In Central Virginia, ensure your driveway is well-crowned and compacted before winter. After winter thaw, address new ruts or washout areas. Spring is ideal for a full maintenance pass with a plate compactor.
Gravel Driveway Repair Cost: DIY vs. Professional Services
Repair costs vary dramatically depending on damage extent, material choices, and whether you do the work yourself or hire professionals.
For small repairs (under 50 square feet), DIY costs typically run $50-200 in materials. Your time investment is 2-4 hours.
For medium repairs (50-200 square feet), materials cost $200-600, depending on depth and whether you rent a plate compactor ($40-80 per day). Your time investment is 1-2 days.
For large repairs or full-driveway regrading (over 200 square feet), materials cost $600-2,000+, with equipment rental adding $100-300. Your time investment is 2-5 days.
Professional services vary by region and contractor. A full driveway repair might cost $1,500-5,000+.
The DIY approach saves money but requires physical effort and skill in grading, compaction, and drainage. Professional services cost more upfront but guarantee proper execution. For property owners in Central Virginia dealing with significant damage or uncertain about their ability to execute repairs, Timber Shredders LLC offers professional services using professional equipment and experienced operators to ensure repairs are done correctly the first time.
Common Mistakes to Avoid When Repairing Gravel Driveways
Most failed repairs share common patterns.
Inadequate sub-base preparation is the most frequent error. Property owners fill a pothole with gravel and expect it to last. When it returns within weeks, they blame the material. The real problem was not addressing the underlying structural issue. Always dig to stable material and assess whether the sub-base is adequate.
Insufficient compaction is equally common. Gravel that hasn’t been properly compacted will shift under traffic. Renting a plate compactor is non-negotiable for anything larger than small spot repairs.
Ignoring water management means your repair will fail during the next heavy rain. A driveway developing damage usually has a drainage problem. Fix the water flow before or during repair.
Using the wrong material wastes money and produces poor results. Don’t use topsoil, sand, or fine material as sub-base. Use proper road base for the sub-base, stone dust for binding, and appropriate top dressing for the surface.
Mixing old and new material reduces compaction effectiveness. Remove old damaged material entirely before adding new material.
Not maintaining the crown means water will eventually pool and damage your repair. Ensure your repair includes a proper crown and maintain it through regular raking.
Delaying repairs turns small problems into expensive ones. Address damage as soon as you notice it.
Conclusion
Repairing gravel driveway damage is achievable as a DIY project if you understand proper sub-base preparation, appropriate material selection, thorough compaction, and water management. For property owners in Central Virginia facing significant damage or lacking time and equipment, professional services provide a reliable alternative.
Timber Shredders LLC specializes in driveway installation and land management with professional equipment and experienced operators who understand Central Virginia’s soil and drainage challenges. Rather than spending weeks on DIY repairs that may fail, have the work done correctly by professionals. Whether you choose DIY or hire professionals, address damage promptly and maintain your driveway regularly to prevent future problems.
Getting your gravel driveway repaired properly is essential for property access and long-term usability. Timber Shredders LLC brings professional-grade equipment, experienced operators, and a comprehensive approach to driveway repair that ensures lasting results. With their simplified process and attention to proper grading, compaction, and drainage, you’ll have a driveway that handles Central Virginia’s weather and vehicle traffic. Get a free quote from Timber Shredders LLC today and reclaim your property’s accessibility and functionality.
Frequently Asked Questions
How do you fix potholes in a gravel driveway?
To fix potholes, first clear debris and vegetation from the damaged area. Shovel out loose material and grade the sub-base level. Fill the pothole with crushed stone or road base aggregate, then compact firmly using a plate compactor or tamping tool. Add a top dressing layer of finer stone dust and compact again. Proper compaction prevents the pothole from reforming under vehicle weight.
What is the best gravel for repairing a driveway?
The best repair approach uses a layered system: start with a 4-6 inch road base layer of crushed stone for the sub-base, add a 2-3 inch middle layer of smaller aggregate, and finish with 1-2 inches of stone dust or pea gravel as top dressing. This multi-layer approach provides proper drainage while maintaining a stable, compacted surface that resists ruts and washout.
How much does gravel driveway repair cost?
Costs depend on damage extent, materials needed, and whether you rent equipment or hire professionals. DIY repairs require purchasing aggregate, stone dust, and possibly renting a plate compactor. Professional services handle assessment, material sourcing, equipment operation, and cleanup. For an accurate estimate specific to your property, contact a local service provider for a free quote.
What causes gravel driveways to develop ruts and washout?
Poor drainage and inadequate compaction are primary causes. When water runoff isn’t managed properly, it erodes the base layer and creates sediment loss. Heavy vehicles on insufficiently compacted aggregate accelerate rut formation. Lack of proper driveway crown (slight slope for water drainage) and missing geotextile fabric between layers also contribute. Address these issues during repair to prevent recurrence.
This article was written using GrandRanker