
Table of Contents
- What You’ll Need Before Starting Land Preparation
- Step 1: Conduct a Site Survey and Boundary Mapping
- Step 2: Perform Soil Testing for Construction Readiness
- Step 3: Obtain Permits and Handle Regulatory Requirements
- Step 4: Clear Land and Remove Debris
- Step 5: Site Grading and Excavation for Proper Drainage
- Construction Site Preparation Checklist
- Understanding Land Clearing Cost and Budget Planning
How to Prepare Land for Construction: Step-by-Step
Last Updated: July 14, 2026
Preparing land for construction is one of the most critical phases of any building project. The difference between a properly prepared site and a hastily cleared one often determines whether your project stays on schedule or faces costly delays. This guide walks you through each essential step to ensure your land is ready for construction crews to arrive.
The process involves multiple interconnected phases: surveying, testing, permitting, clearing, grading, and drainage planning. Each step builds on the previous one, and skipping any phase creates cascading problems. A contaminated soil discovery after grading begins can halt your entire project. An undiscovered utility line can mean injury or massive repair costs.
What You’ll Need Before Starting Land Preparation
Before breaking ground on any clearing or excavation work, gather essential information and documentation that will guide every decision moving forward.
Start by collecting your property deed, survey records, and any previous site assessments or environmental reports. Request utility locate maps from your local utility authority; these show where water, sewer, gas, electric, and telecommunications lines run across your property. Identify your local zoning ordinances and building codes, which dictate setbacks, heights, and density requirements. Contact your county or municipal planning office to understand whether your land requires environmental impact assessments, wetland surveys, or endangered species reviews.
Assemble contact information for your local building department, planning office, health department, and environmental agency. Finally, document the current condition of your land: take photos, note vegetation, and observe how water flows during or after rain.
Step 1: Conduct a Site Survey and Boundary Mapping
A professional site survey establishes exact property lines, identifies topographic features, and creates the baseline map for all subsequent work.
Hire a licensed surveyor to conduct a boundary survey. The surveyor will locate your property corners using historical records and on-site measurements, establishing your legal boundaries and preventing disputes with neighbors. The surveyor will also mark easements, areas where utilities or neighbors have rights to cross your land.
Request a topographic survey as well. The surveyor measures elevation changes across your property, creating contour lines that show slopes and drainage patterns. This data is essential for grading and drainage planning.
The surveyor produces boundary and topographic survey maps that become your master reference documents. Share these with your civil engineer, architect, and contractor.
Step 2: Perform Soil Testing for Construction Readiness
Soil composition determines whether your site can support the structure you plan to build. Poor soil conditions discovered after excavation begins force expensive remediation or redesign.
Hire a geotechnical engineer to conduct soil testing and analysis. The engineer will recommend boring locations based on your site plan and proposed building footprint. Borings typically go 30-50 feet deep. The engineer extracts soil samples at multiple depths and tests them in a laboratory.
These tests measure soil bearing capacity, soil type (clay, silt, sand, rock), moisture content, and stability. The report includes recommendations for foundation design and whether the site requires special measures like soil stabilization or pilings. Geotechnical reports also flag potential problems: high water tables, expansive clays, contaminated soil, or weak subsurface layers.
The geotechnical assessment typically costs $1,500-3,500 for a residential lot or small commercial site. This investment prevents foundation failures and costly design changes.
Step 3: Obtain Permits and Handle Regulatory Requirements
Construction permits ensure your project meets building codes, environmental standards, and zoning requirements. Permit delays are among the most common reasons projects fall behind schedule.
Contact your local building department and request a pre-application meeting. Present your survey, site plan, and proposed project. The building official will identify which permits you need: building permit, grading permit, erosion control permit, stormwater management permit, and potentially environmental permits.
Prepare your permit applications with your architect or engineer. Applications typically include site plans showing property lines, building location, utility connections, drainage patterns, and erosion control measures. Submit applications and expect a 2-8 week review period. Plan for comments and revisions, as most permits go through at least one revision cycle.
Step 4: Clear Land and Remove Debris
Land clearing removes trees, brush, stumps, and other vegetation from your site. This work must be done carefully to protect remaining trees, prevent erosion, and manage waste responsibly.
Assess which trees to keep and which to remove. Retained trees provide shade, windbreaks, and erosion control. Mark trees clearly so your clearing contractor knows which ones to preserve.
Hire a professional land clearing contractor with forestry equipment. Forestry mulching equipment grinds trees and brush into mulch on-site, eliminating the need for haul-away and reducing erosion risk. This approach improves soil health while clearing efficiently.
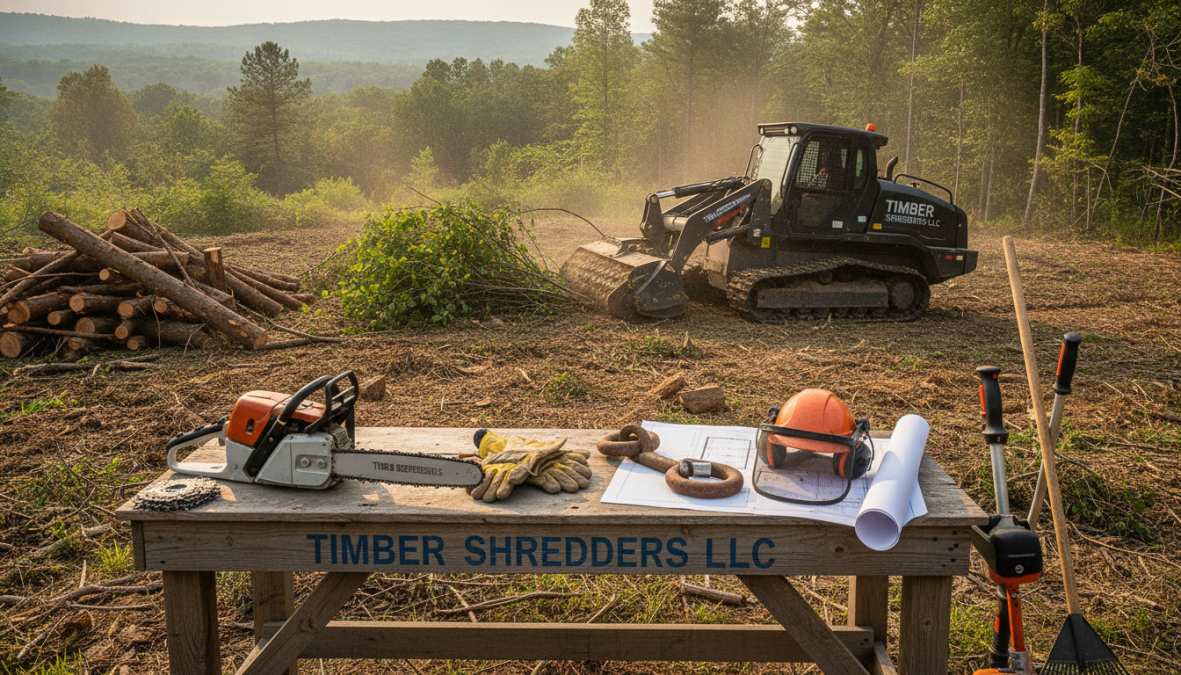
After clearing, the site should be free of vegetation, stumps, and debris down to the root level. Document the cleared site with photos to confirm completion to specification.
Step 5: Site Grading and Excavation for Proper Drainage
Grading shapes the land to direct water away from structures, create building pads at proper elevations, and establish the foundation for construction. Poor grading causes water infiltration and foundation problems.
Your civil engineer develops a grading plan based on the topographic survey and site conditions. The plan shows existing elevations, proposed finished elevations, drainage swales, and fill or cut areas. The goal is to slope land away from structures at a minimum 2% grade.
Hire an excavation contractor with grading experience. The contractor uses dozers, graders, and compactors to move earth according to the grading plan. As grading progresses, the site is compacted in lifts. Proper compaction prevents settlement and creates stable building pads.
Establish stormwater management features during grading. Drainage swales direct water away from structures toward natural drainage or detention areas.
Construction Site Preparation Checklist
Use this checklist to track completion of each preparation phase.
| Phase | Task | Status | Responsible Party | Completion Date |
|---|---|---|---|---|
| Pre-Work | Obtain property deed and survey records | ☐ | Owner | , |
| Pre-Work | Request utility locate maps | ☐ | Owner/Contractor | , |
| Pre-Work | Review zoning ordinances and codes | ☐ | Owner/Architect | , |
| Survey | Hire licensed surveyor | ☐ | Owner | , |
| Survey | Conduct boundary survey | ☐ | Surveyor | , |
| Survey | Conduct topographic survey | ☐ | Surveyor | , |
| Testing | Hire geotechnical engineer | ☐ | Owner | , |
| Testing | Conduct soil boring and testing | ☐ | Geotechnical Engineer | , |
| Testing | Receive geotechnical report | ☐ | Geotechnical Engineer | , |
| Permits | Submit building permit application | ☐ | Architect/Engineer | , |
| Permits | Submit grading permit application | ☐ | Architect/Engineer | , |
| Permits | Obtain erosion control permit | ☐ | Contractor/Owner | , |
| Permits | Receive all permits | ☐ | Building Department | , |
| Clearing | Mark trees for removal and retention | ☐ | Contractor | , |
| Clearing | Clear vegetation and stumps | ☐ | Clearing Contractor | , |
| Clearing | Remove or chip debris | ☐ | Clearing Contractor | , |
| Clearing | Document cleared site with photos | ☐ | Contractor | , |
| Grading | Develop grading plan | ☐ | Civil Engineer | , |
| Grading | Excavate and grade site | ☐ | Excavation Contractor | , |
| Grading | Compact soil to specification | ☐ | Excavation Contractor | , |
| Grading | Install drainage swales | ☐ | Excavation Contractor | , |
| Grading | Verify final grades and drainage | ☐ | Civil Engineer | , |
| Utilities | Locate existing utilities | ☐ | Utility Locating Service | , |
| Utilities | Plan utility connections | ☐ | Civil Engineer | , |
| Utilities | Install utility trenches (if required) | ☐ | Utility Contractor | , |
| Erosion Control | Install silt fencing | ☐ | Contractor | , |
| Erosion Control | Install erosion control blankets | ☐ | Contractor | , |
| Erosion Control | Stabilize disturbed areas | ☐ | Contractor | , |
| Final Inspection | Request building department inspection | ☐ | Contractor | , |
| Final Inspection | Pass site preparation inspection | ☐ | Building Inspector | , |
Understanding Land Clearing Cost and Budget Planning
Land clearing costs vary dramatically based on site size, vegetation density, equipment access, and disposal method.
Clearing costs depend primarily on the volume of vegetation and debris. A quarter-acre residential lot with light brush might cost $500-1,500 to clear. The same lot densely covered with trees could cost $3,000-8,000. Site access matters significantly; if heavy equipment must be brought in through a narrow driveway, costs increase.
Disposal method affects total cost. Forestry mulching on-site eliminates haul-away costs but requires specialized equipment. Traditional tree removal with log and stump haul-away costs more but may be necessary if you want to salvage timber.
Budget for site surveys ($300-800), geotechnical testing ($1,500-3,500), and permits ($500-2,000 depending on jurisdiction). Grading and excavation costs depend on the volume of earth to move and site complexity. Simple sites might cost $2,000-5,000. Complex sites can exceed $15,000.
The work you do in this preparation phase directly determines whether your construction project proceeds smoothly or encounters costly delays. Proper surveying, testing, permitting, clearing, and grading create a solid foundation for construction. Skipping steps or rushing through phases creates risk that far outweighs any short-term savings.
Preparing land for construction requires coordination across multiple disciplines and regulatory agencies. A systematic approach makes it manageable. Professional land clearing and site preparation is an investment in project success that prevents far costlier problems later.
Frequently Asked Questions
What are the main steps to prepare land for construction?
The key steps include site surveying and boundary mapping, soil testing for construction, obtaining permits, clearing land and debris removal, site grading and excavation, utility planning, and erosion control installation. Each phase builds on the previous one to ensure your property is ready for the foundation and building process. The exact sequence may vary based on local regulations and site conditions.
How much does land clearing cost and what factors affect pricing?
Land clearing cost depends on property size, vegetation density, terrain complexity, debris removal requirements, and site accessibility. Pricing varies significantly by region and project scope. For an accurate estimate tailored to your property, contact a professional land management company for a site assessment. They can evaluate your specific conditions and provide transparent pricing based on your land’s unique characteristics.
Do I need permits to prepare land for construction?
Yes, most jurisdictions require permits for land clearing, grading, and construction site preparation. Permit requirements vary by location and may include zoning ordinances compliance, environmental impact assessments, and stormwater management plans. Contact your local building department early in the planning process to understand all regulatory requirements for your property. Professional contractors can often help navigate the permitting process.
Should I hire a professional or attempt DIY land preparation?
Professional contractors are recommended for most land preparation tasks due to equipment needs, safety requirements, and technical expertise. Site surveying, geotechnical assessment, utility planning, and heavy grading typically require specialized knowledge and machinery. DIY work is limited to minor clearing and basic site organization. Professional land management companies can complete projects faster, ensure compliance with regulations, and reduce costly mistakes.
How long does it take to prepare land for construction?
Timeline depends on property size, site conditions, and permit processing time. Basic land clearing may take days to weeks, while full site preparation including surveying, testing, permitting, and grading can take several weeks to months. Permit approval often adds 2-6 weeks. Weather conditions and soil conditions also affect scheduling. Discuss realistic timelines with your contractor during the initial assessment.
This article was written using GrandRanker